



Learn how to perform a system recovery on Launch X431 diagnostic tablets running Android 10 without physical volume buttons, including PRO5, IMMO Plus, CRP919X BT, CRP919E BT, and more.
Supported Diagnostic Hardware
This recovery procedure applies to the following Launch X431 diagnostic tools:
Launch X431 Pro Series:
- X431 PRO5
- X431 PRO (V 5.0)
- X431 V+ 5.0 (PRO3)
- X431 PRO3S+ Elite/PRO3 V+ Elite
- X431 PRO3S+ V5.0
- X431 PROS V5.0
- X431 PROS Elite/PRO Elite
- X431 PRO3 APEX/ACE
- X431 PRO TT/DYNO/STAR
- X431 PRO3S+ SmartLink HD
- X431 V+ SmartLink HD (PRO3 LINK HD)
Launch X431 IMMO Series:
Launch CRP919 Series:
…
Step-by-Step System Recovery Procedure
1.Entering Android Recovery Mode:
- Long press the Power button to power off the device completely
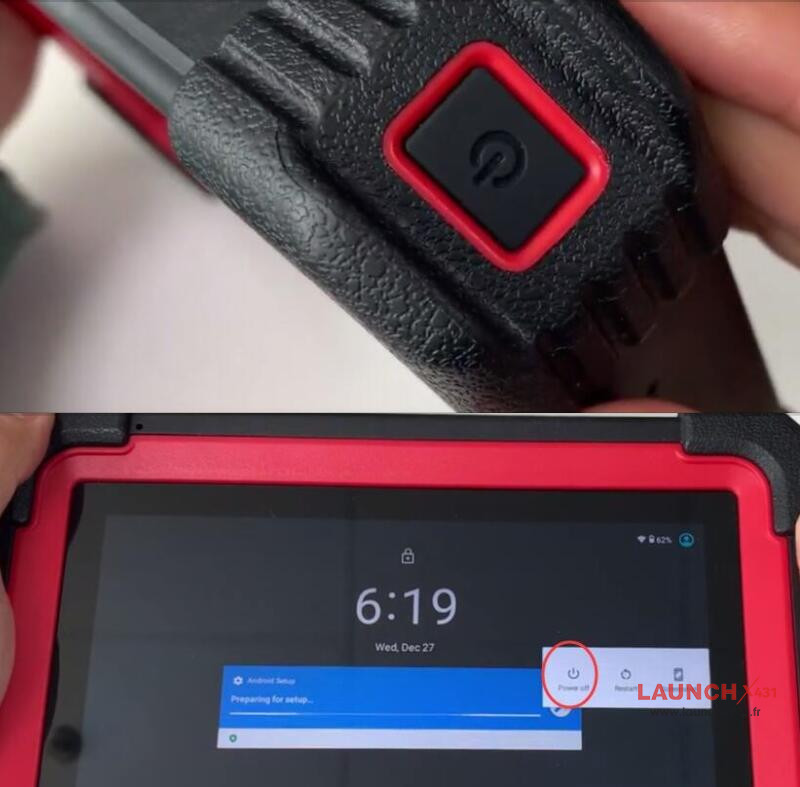
- Power on the tablet. As soon as the LAUNCH logo appears on the screen, quickly press the Power button 5 times
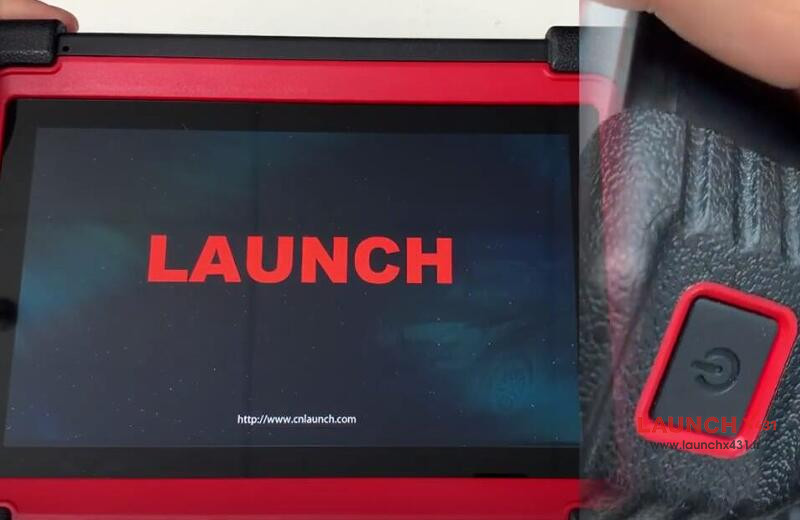
- The tablet will enter the Android recovery screen.
2.Wiping Cache and System Data:
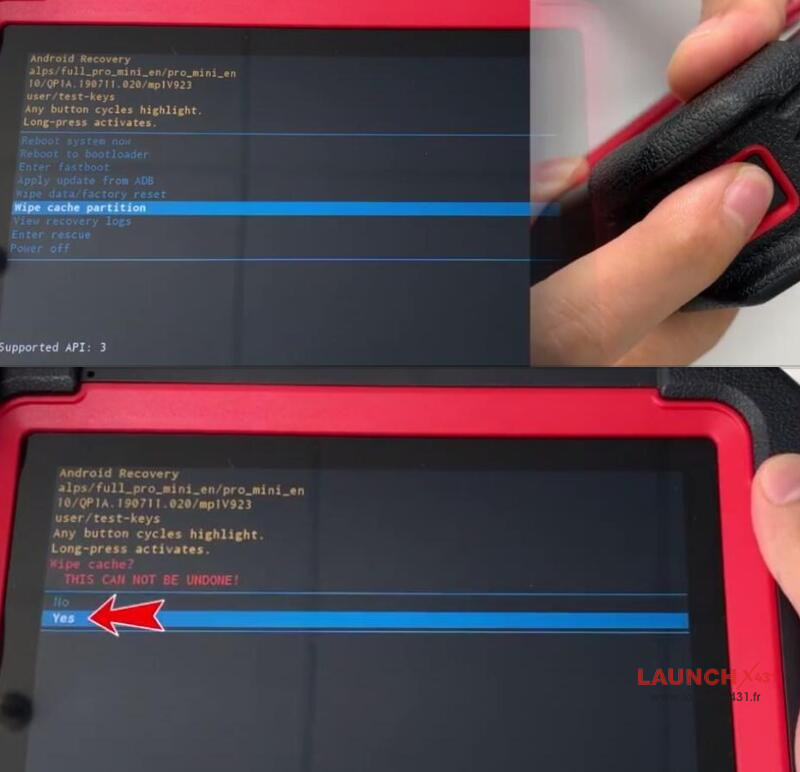
- Short press the Power button to highlight Wipe cache partition, then long press the Power button to confirm. Select Yes
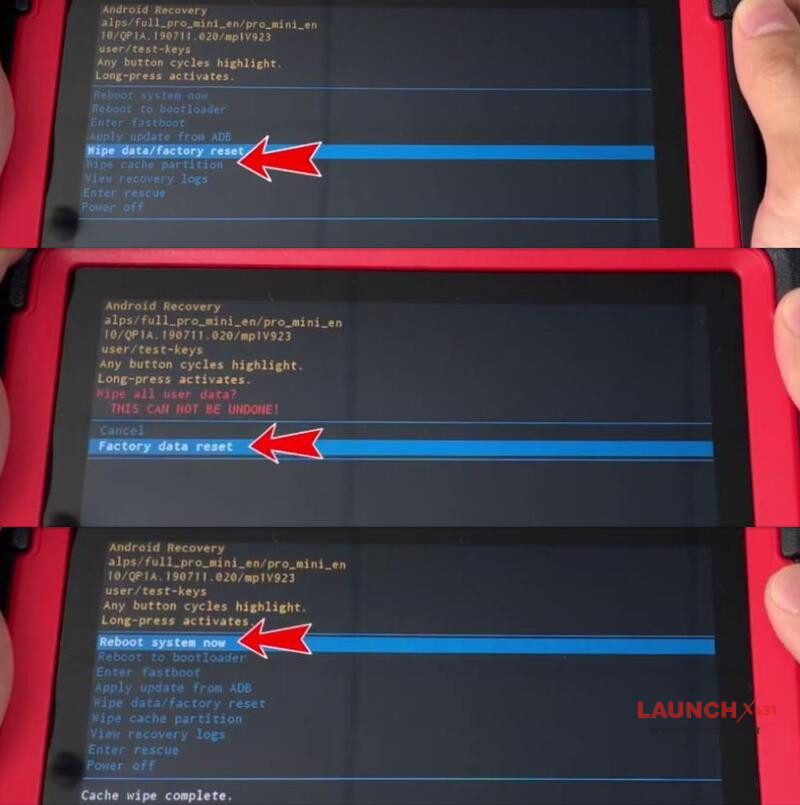
- Highlight and select Wipe data/factory reset, confirm Factory data reset, and select Reboot system now
3.Initial OS Configuration:
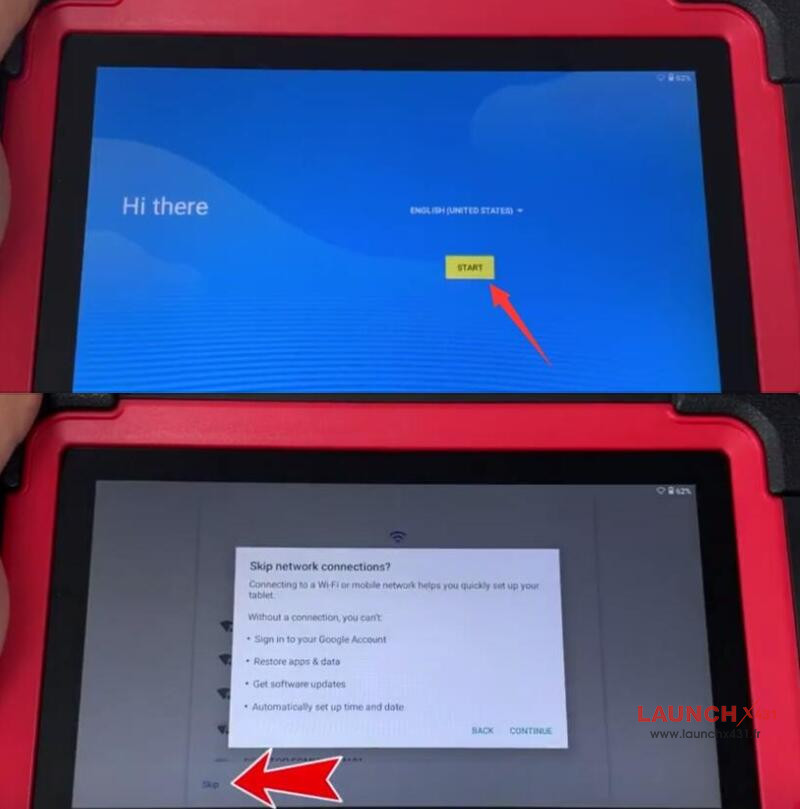
- After the system reboots, tap START. On the Wi-Fi setup page, tap Skip
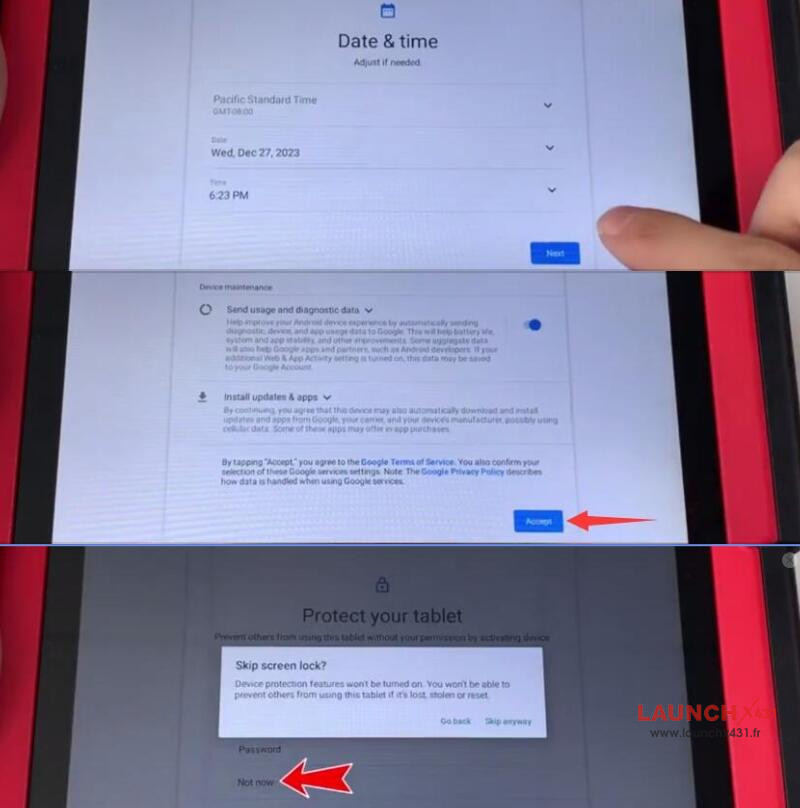
- Set your local time zone and date/time parameters. Accept the Google Services terms.
- On the tablet protection screen, select Not now and skip the screen lock setup
4.Network Setup & App Initialization:
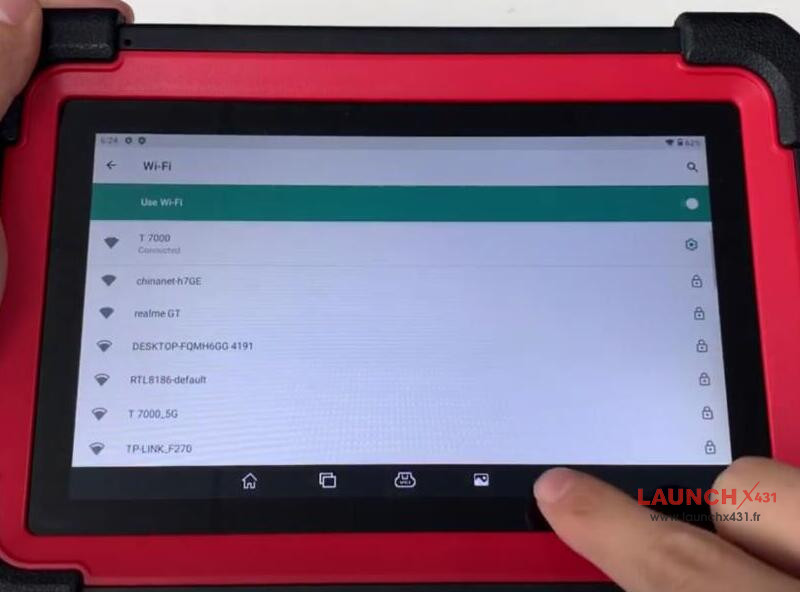
- Open the Settings icon on the home screen
- Go to Network & Internet > Wi-Fi and connect to an available network
- Swipe up on the home screen and open the APP Init tool
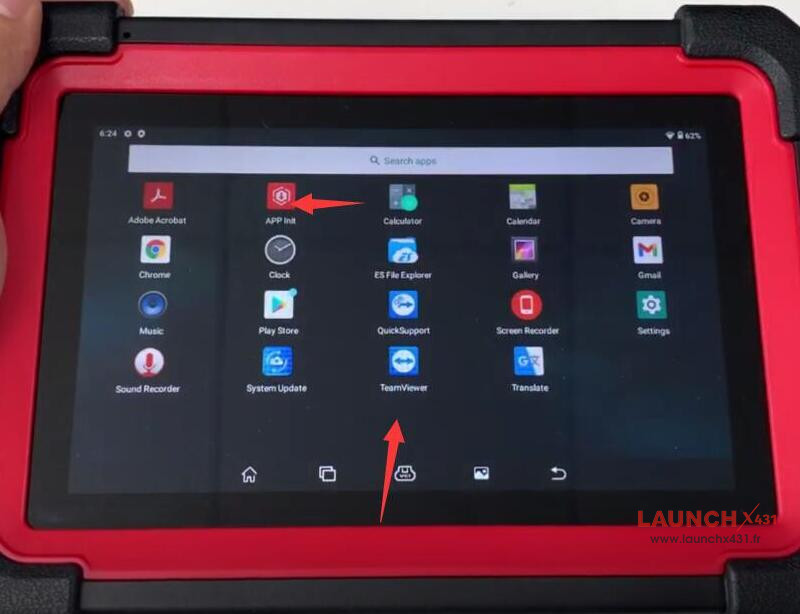
- Enter your Launch X431 tablet serial number to install the base application
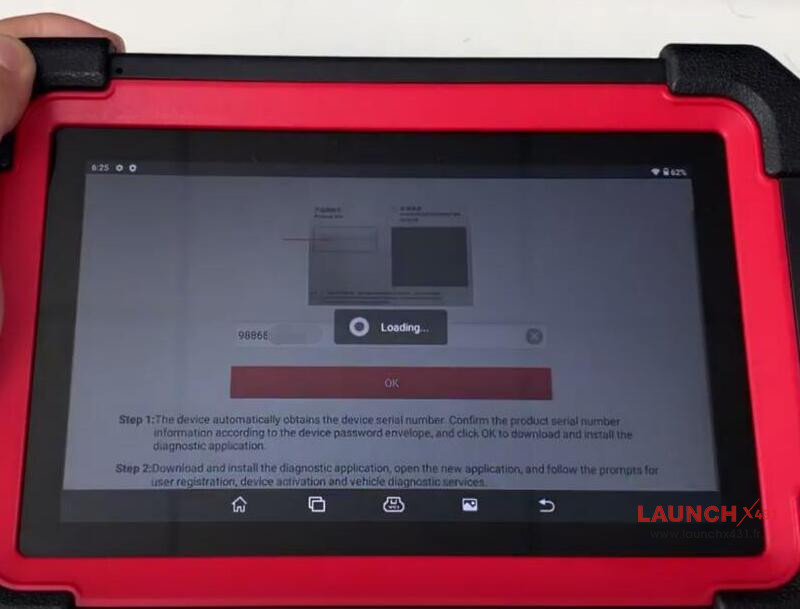
5.Software Restoration:
- Open the newly installed diagnostic app and select ALLOW for all system permissions
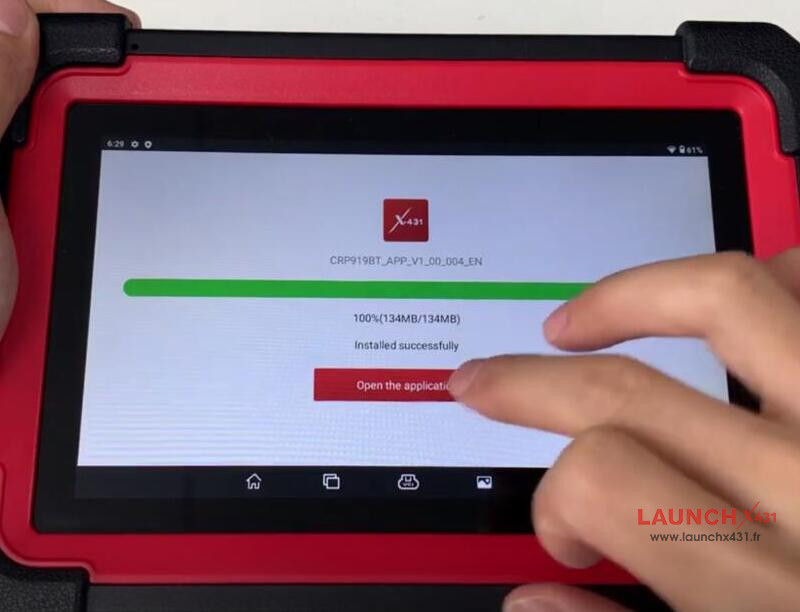
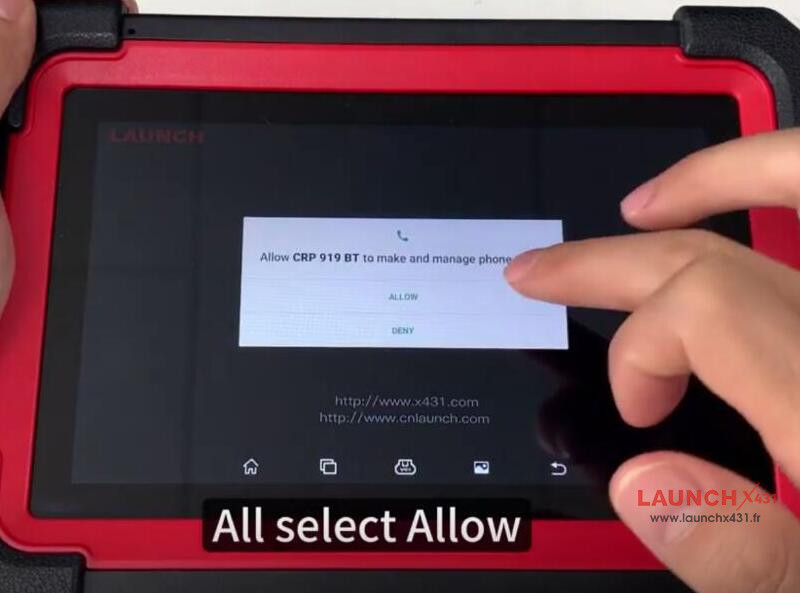
- Log into your account using your original username and password
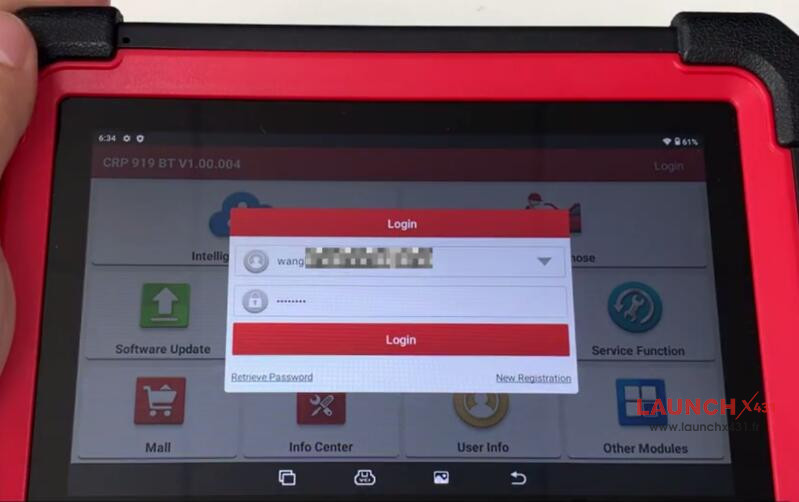
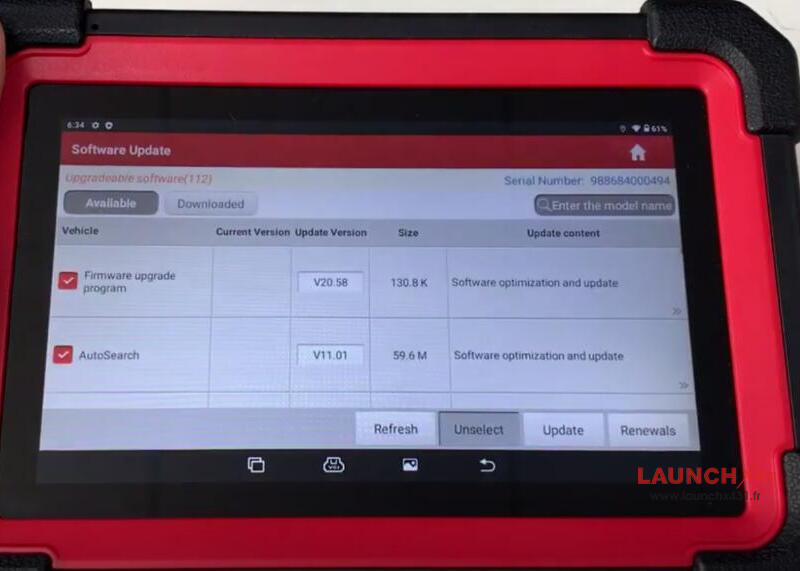
- Navigate to Software Update in the main menu and select all required software packages to update